Photo taking...easy right? Ha!
This weeks time sucker has been wrapped up in trying to take photos of the 3010 things in the studio waiting for their close up. In addition to that I've been teaching my daughter how to take pics for Etsy and assist while I take some.
In a nut shell it took two days to take 250 pictures, then another day until 1 am to re-sample them and catalogue them for the shop. I still need descriptions, measurements, pricing...it never seems to end.
But I'm getting ahead of myself...lets start at the beginning. Back here:
http://susanscharmingtrinkets.blogspot.com/2011/10/whats-up-this-week.html
I started to tell you about my photo box and my attempts at taking pics of my jewelry. That photo box is one of the best things I've ever built and it cost the price of a recycled box, about 1/2 yard of white cotton fabric (maybe $2.50), and a roll of white duct tape ($5.00) which I didn't use up.
So here's the whole thing as it looks now in my new studio area:
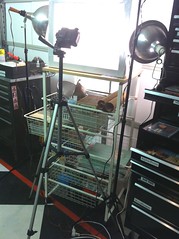 |
| It's on wheels! |
So I put the whole thing on wheels which means I have the option of putting the light box anywhere I want. If the day is lovely I move the whole thing outside or if I have a class I can hide it in a corner somewhere. It's a beautiful thing.
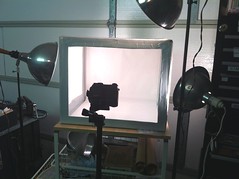 |
| closer |
Here it is a bit closer up with all the lights blazing. Those are photo lights on tripods with the exception of one, lower right, is an $8 clip lamp from Home Depot. The clip lights work great and work just the same as the other photo light set up. (I just had a friend gift them to me or I'd have all clip lights!) Currently they all have daylight old style light bulbs in them. (this has a two fold reason behind it...explanation for another post)
You can see underneath the box there is a roll of paper, a box of some kind...etc. Props...today we're were working on shots of vintage jewelry hence the vintage back drop pieces.
 |
| Playing with the backdrop |
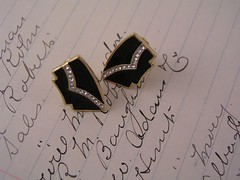
The cart allows the room for all my props to be stored underneath the light box...easy and within reach. So, we start with a couple of vintage cigar boxes and some sheet music. There is always a long sheet of white paper hanging from the back of the box. For experimentation sakes I changed it to this:
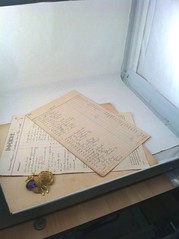 |
| Changed to vintage papers |
Lets see what both look like through my camera lens...(I should note this is a shot with the camera setting to macro(tiny flower on your camera somewhere) and no flash. This is not a DSLR camera and its about 10 years old, she's my friend!)
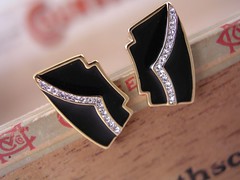 |
| Cigar box background |
I kind of like that. Now this picture has had no adjustments or manipulation except that I made it 72 dpi (web sized). Other than that this is exactly how my camera saw it. Now for the paper:
Again no other manipulations except the re-sizing and it's a little different viewpoint. Hmmm, not sure if its the shot itself or the background but I like the other picture better.
What do you think?
Next time I will show you my mixed media supply shop pictures and the magic of a photo program!
Have an artful day!

4 comments:
OK that's is! I'm going to copy this, if you don't mind. I'm just going to adjust it a bit. What a clever idea. My hat is off to you!
I like the first one the best, too. I think you need brighter colors for things that are black to give more contrast. This is a great and very thorough post, Susan! I have a similar set up, but don't have it nearly as well organized and efficient as yours - you have given me some wonderful ideas - Thank you! (Right now I don't have a box like yours - I rigged something together with stuff I had laying around - it works o.k. , especially if I need to take photos of things that are taller.
That was a fabulous post, Susan!! I like the first one too, although you all know how much I LUV Kathleen's ledger paper!! I think the script is fighting with the earrings in this case. If the earrings were off to the side a bit in the white space, that may be better. But I agree- I like cntrast with black, so that little strip of red shows off the earrings best. Loved this writeup. I am going to try to build one of these boxes!!
I loved this post! I'm thinking of making something siimilar, what a great idea to put it on a cart! Thanks!
Post a Comment